
Last updated October 16, 2026
Attic Insulation Maintenance Checklist for Fresno Homeowners
An attic that “looks fine from the hatch” is doing the most expensive thing an attic can do: pretending to work while it quietly fails. We’ve walked into Fresno attics where the insulation looked like a fresh snowdrift from the opening, only to find the eaves completely bare, the center compressed to half its original depth, and rodent tunnels running through the blown-in like a subway map. The homeowner was losing up to 30% of their thermal performance and had no idea because the one spot you can see from the hatch is exactly where the insulation looks deepest. This guide gives you a working homeowner’s checklist for inspecting and maintaining attic insulation in Fresno, including the three zones you must physically inspect, the specific damage patterns we see in the San Joaquin Valley, and how to measure whether your R-value has drifted using nothing fancier than a ruler and an afternoon. For a deeper dive, see The Complete Guide to Insulation in Fresno.
Quick Answer
A Fresno attic insulation maintenance checklist should include inspecting the eaves, center field, and hatch perimeter zones for displaced or compressed material, checking for rodent tunnels and droppings, looking for moisture stains or mold on the underside of the roof deck, verifying vent baffles are clear, measuring blown-in depth against the target R-value for Climate Zone 3, and documenting everything with photos. If you’d rather have a pro handle this, our Attic Insulation services include thorough inspections. Most issues can be spotted with a once-a-year walk-through, timed for October before heating season, and a thorough inspection of a typical Fresno attic takes about 45 minutes.
Table of Contents
- The Three Zones You Must Physically Inspect, Not Just View from the Hatch
- How to Identify Rodent Tunneling in Blown-In Insulation
- Seasonal Timing: Why October Is the Critical Inspection Window in Fresno
- How to Measure R-Value Drift with a Ruler and One Afternoon
- Moisture, Ventilation, and the Underside of the Roof Deck
- What to Document and Photograph for an Accurate Quote Without an In-Person Visit
- Common Mistakes to Avoid
- When to Call a Professional
- Frequently Asked Questions
The Three Zones You Must Physically Inspect, Not Just View from the Hatch
Most Fresno homeowners check their attic insulation the way you’d check a hotel room: open the door, glance around, close the door. The problem is that the hatch opening in a Fresno home is almost always positioned near the center of the attic, which is exactly where blown-in insulation tends to sit deepest and look most even. The edges, where the real problems live, are hidden from that angle. You need to get on your hands and knees and physically inspect three zones. The first zone is the eaves, where the roof meets the exterior walls. This is the most critical and the most commonly failed area in Fresno attics. Blown-in fiberglass and cellulose drift away from the eaves over time because of air movement, gravity, and the simple physics of loose-fill settling. When the insulation pulls back from the eaves, you create a thermal channel along the entire perimeter of your ceiling, and Fresno’s summer attic temperatures of 140 degrees and up pour heat straight through that gap. The second zone is the center field, the broad open area between the eaves. Here you’re looking for compression. Insulation that was originally fluffed to 14 inches may have settled to 9 or 10, and every inch of lost depth is lost R-value. The third zone is the hatch perimeter itself, the most overlooked spot in the house. The hatch is a hole in your ceiling, and the area around it is a leak point for both air and heat transfer. You want to check that the hatch has insulation on its top surface, that weatherstripping around the frame is intact, and that the hatch closes fully without gaps.
When we walk through these zones on an attic insulation inspection in Fresno, we’re not just confirming that material exists. We’re verifying that it exists where it matters, at the depth it matters for Fresno’s Climate Zone 3 requirements. The standard target for our area is R-38 in the attic, which typically means 10 to 14 inches of blown-in fiberglass or 8 to 10 inches of cellulose, depending on density. If your insulation has drifted away from the eaves, your effective R-value is lower than the label suggests, even if the center still measures fine.
How to Identify Rodent Tunneling in Blown-In Insulation
Rodent damage in blown-in insulation is a silent killer because it doesn’t announce itself the way a visible hole in the roof would. Mice and roof rats, both common in Fresno, tunnel through the material to create travel routes and nesting pockets. The tunnel itself compresses the insulation along its path, and the voids left behind create direct thermal bridges. In our experience across Fresno neighborhoods, from Tower District to Clovis-adjacent newer construction, this is one of the most under-diagnosed causes of underperforming attics.
Here’s how to spot tunneling, step by step:
- Look for shallow depressions rather than obvious holes. Rodent tunnels in blown-in are rarely deeper than a few inches below the surface. They don’t look like chasms; they look like subtle furrows, as if someone dragged a fist lightly across the top. The key is to look for long, straight, or gently curving lines, not random divots.
- Check the interface between insulation and the top plate of the walls. Rodents travel along edges and vertical surfaces. The zone where insulation meets the eaves is their prime highway. Run your eyes along the entire perimeter and look for flattened, worn paths.
- Look for dark specks and grease marks. Rodent droppings in insulation are small, dark, and often scattered along the tunnel routes. Body oils leave a greasy residue on the fibers. If you see a dark smear or a line that has more of a brownish tint than the surrounding insulation, that’s a trail.
- Listen for movement in the early morning. This isn’t a visual cue, but it’s a reliable companion. Rats in Fresno attics are often most active just before dawn. If you hear scratching or scurrying between 4 and 6 a.m., there’s a very high likelihood of tunneling damage even if you haven’t spotted it yet.
- Compare the depth of the suspect area with the surrounding material. Press your hand gently into the tunnel area and then into a pristine patch a few feet away. The tunneled area will feel denser and shallower because the rodents have packed the material down as they traveled.
The critical thing to understand is that rodent damage doesn’t self-correct. The empty tunnel spaces remain after the rodents are removed, and the compressed material doesn’t fluff back up on its own. In most Fresno attics with tunneling, the effective R-value has been reduced in those channels by 40% or more. If you’ve had a rodent problem in the past and treated just the pest control side of it, your insulation may still be compromised. Fixing this typically means either re-fluffing and topping up the affected zones or, in severe cases, vacuuming out the contaminated material and starting fresh.
Seasonal Timing: Why October Is the Critical Inspection Window in Fresno
Fresno’s climate creates a specific, predictable rhythm for attic maintenance, and most homeowners are a season late. The worst damage to attic insulation happens in the summer, not the winter. From June through September, attic temperatures regularly climb past 140 degrees, which accelerates the settling of blown-in material and pushes any moisture issues to their driest and most damaging extreme. By the end of September, all that summer stress has taken its toll. If you inspect in October, you see the accumulated damage at its fullest expression, before the heating season masks the symptoms. Once the heater comes on, the temperature differential between the house and the attic drops, and the HVAC system compensates for gaps you’d otherwise notice. It’s harder to feel a draft in the ceiling when the system is blowing warm air across it.
We recommend putting attic inspection on the calendar for late October in Fresno, ideally the last two weeks. Here’s why that timing works:
- The summer heat has done its worst. You’re seeing the attic at its most settled, its most heat-stressed, and its most damaged state, which is what your house has actually been living with for the last four months.
- You’re ahead of the first real cold snap. Fresno winters are mild compared to the Northeast, but December and January nights in the 30s are normal. By inspecting in October, you find gaps before you’re paying to heat through them.
- Rodent activity is entering its seasonal peak. As outdoor temperatures drop in November, roof rats and mice move inside. Inspecting in October gives you a baseline before the intrusion season, so if you re-check in December and see new tunnels, you know you have an active problem.
- Contractor schedules are more flexible. In Fresno, insulation crews are busiest in the spring when new construction and renovation projects kick off, and again in the fall when utility bills spike. October is the sweet spot for getting a professional out quickly if you find something you want fixed.
Skip the October check and you’re effectively blind for another year. The attic doesn’t send you a reminder when it’s underperforming. It just quietly wastes your cooling dollars every summer and your heating dollars every winter, and the only person who notices is the guy reading your PG&E bill.
How to Measure R-Value Drift with a Ruler and One Afternoon
Every insulation product has a labeled R-value: the measure of its resistance to heat flow. But that label describes the material as installed, at its intended depth and density. Time changes that. Blown-in fiberglass settles. Cellulose settles. Movement in the attic shifts material around. The result is what we call R-value drift: the slow, silent erosion of your attic’s actual thermal resistance relative to what it says on the package. The good news is that measuring for drift is genuinely simple. You do not need a thermal camera, an energy auditor, or any specialized tool. You need a standard ruler, a pencil, a flashlight, and one free afternoon.
- Clear a path first. Before you measure anything, make sure you can move safely through the attic. You will be walking on ceiling joists, not on the insulation itself. If you step through to the drywall below, you’ll have a much more expensive problem than R-value drift. Wear a dust mask, gloves, and eye protection.
- Take measurements in at least 8 to 10 spots. Sample across the whole attic: near the eaves, at the center field, near the hatch, and at least two random interior points. Do not measure once and call it done. Drift is never uniform. The center of the attic may measure fine while the eaves have drifted to half-depth.
- Press the ruler down until it touches the drywall or ceiling below. You want the depth of the insulation from bottom to top, not just the fluffy part floating on top. Record the number.
- Compare your numbers to the Fresno target. For Climate Zone 3, the current code target is R-38 in attics. For blown-in fiberglass, that’s about 10 to 14 inches depending on density. For blown-in cellulose, it’s about 8 to 10 inches. If your measurements are below those ranges, especially around the eaves, your R-value has drifted.
- Factor in compression, not just depth. If the material feels dense and matted, even if it measures the right depth, it may have lost loft. Fluffed insulation has air pockets that do the actual insulating work. Matted insulation is like a sleeping bag that’s been stored compressed: same amount of material, far less performance.
- Note visible gaps, bare spots, and thin patches. R-value drift isn’t just about average depth; it’s about consistency. One bare strip along a wall means the whole edge of your ceiling is a heat path, even if your average depth across the attic is fine.
If you find drift, the fix in many Fresno attics is a top-up rather than a full re-install. We work with several blown-in materials, including GreenFiber cellulose, which settles more uniformly than some fiberglass products, and we can give a written price for whatever approach fits your attic. The key is to measure first. You can’t know what you need until you know what you have.
Moisture, Ventilation, and the Underside of the Roof Deck
Fresno is not a wet climate. That’s exactly why moisture damage in attics catches so many homeowners by surprise. It doesn’t come from rain through the roof, at least not primarily. It comes from the inside of the house, carried by warm air that leaks up from the living space and hits the cooler underside of the roof deck. When that warm, humid air condenses, you get moisture on the wood. In a Fresno attic, the effects often show up as dark stains, mold growth, or the faint musty smell that lingers even after you’ve closed the hatch.
Here’s what to look for:
- Dark or water-stained patches on the underside of the roof decking. These are usually most visible in the morning when temperatures are cooler. In a Fresno summer you might never see active condensation, but the stains from winter moisture cycles remain.
- Mold, mildew, or rust on the nails piercing through the roof deck. Rusted nail points or dark circular stains around nail heads indicate recurring moisture, not a one-time event.
- Insulation that feels damp or clumpy. Blown-in material that has been exposed to moisture loses its loft and its R-value. It can also become a home for mold that then spreads through the material.
- Blocked or missing vent baffles at the eaves. The baffles are the cardboard or foam channels that direct outside air from the soffit vents into the attic. If they’re blocked by drifted insulation or fallen out entirely, your attic ventilation stops working. In Fresno, where summer heat loads are extreme, a non-ventilated attic becomes an oven, and the roof deck cooks from both sides.
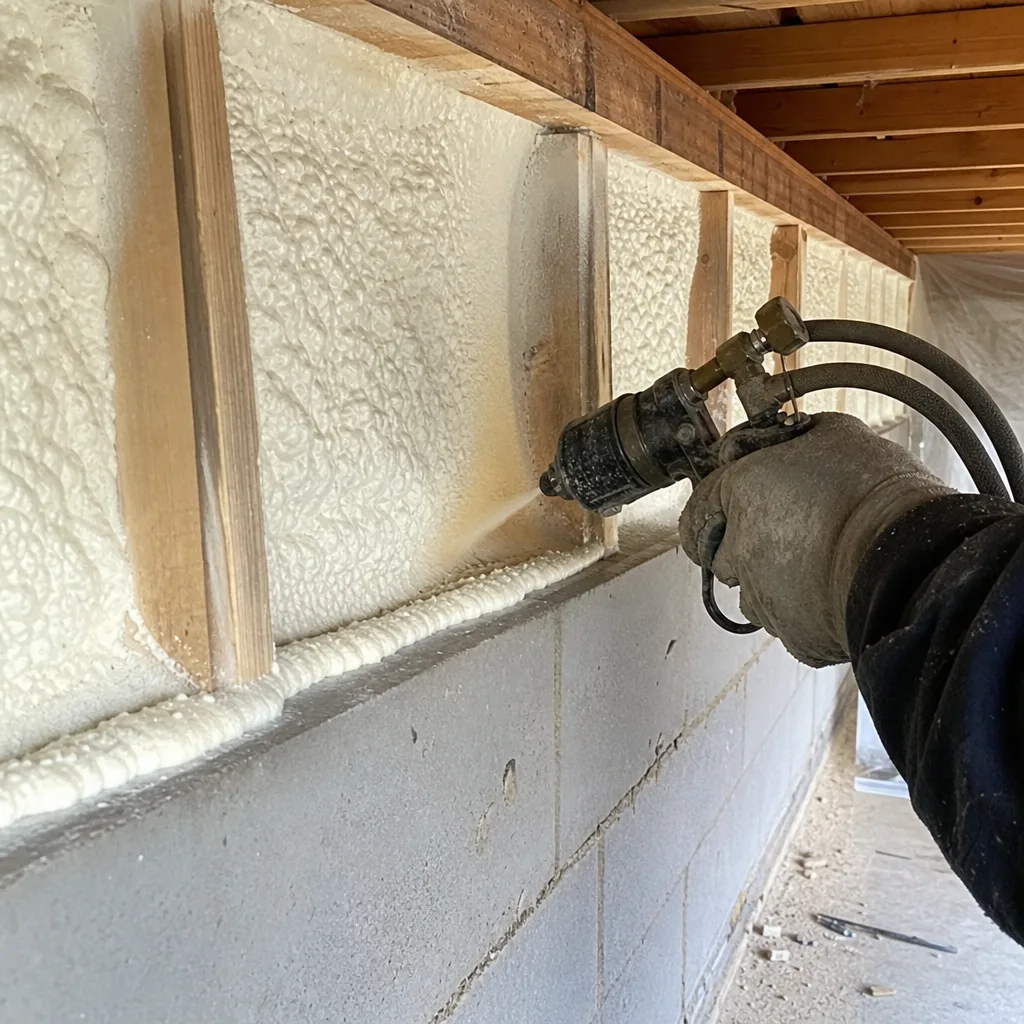
The fix for moisture issues depends on where the moisture is coming from. If the baffles are blocked, clearing them and reinstalling them correctly might be all you need. If air is leaking from the house into the attic through recessed lights, the hatch, or wall top plates, you need air sealing before you worry about anything else. We offer spray foam insulation in Fresno, and one of the materials we work with, Icynene, is particularly good at air sealing the places where warm inside air sneaks into the attic, because it expands on contact and fills the gaps that batt and blown-in simply lay across. A proper air seal is the most reliable long-term defense against moisture generation in the attic cavity.
What to Document and Photograph for an Accurate Quote Without an In-Person Visit
If you’ve found problems, or if you just want a professional eye on your results, you don’t necessarily need anyone to come out to your house to give you an accurate price. We quote many Fresno attic projects from homeowner-provided photos and measurements alone, and the better your documentation, the tighter the quote. Here’s a checklist of what to capture:
- A wide shot of the attic from the hatch. Stand at the opening and photograph the attic as a whole. This gives context for everything else.
- Close-ups of each of the three zones. One photo of the eaves on each side of the attic, one of the center field showing depth, and one of the hatch perimeter showing the frame and weatherstripping.
- A ruler in the insulation. Push a ruler down to the drywall and photograph it from the side so the depth is clearly visible. Repeat this in at least three different locations, including one near the eaves.
- Any damage you found. Tunnels, bare patches, water stains, rusted nails, mold spots, blocked baffles. Capture each one in its own frame, with enough surrounding context that the location is identifiable.
- The attic access hatch itself. Photograph it open and closed from the living space below. Include the frame and any weatherstripping, so we can see what kind of seal exists now.
- The square footage of your attic floor. You can pull this from your home’s floor plan or measure the length and width of the ceiling footprint from inside the attic. Total square footage is essential for material calculations.
- Existing insulation type and approximate depth. Note whether it’s blown-in fiberglass, cellulose, or batt, and include your ruler numbers.
Send the photos along with your address and a brief description of what you’ve observed. We’ll come back with a specific material recommendation and a written price before any work begins. That written price, in fact, is a non-negotiable part of how we operate: it’s put on paper and delivered to you before the first technician walks through your door.
Common Mistakes to Avoid
- Inspecting only from the hatch. The hatch is not a viewing platform. It’s a convenient opening, but the critical areas, especially the eaves, are invisible from that vantage point. Get into the attic and physically look at the zones.
- Assuming newer homes don’t need checking. A Fresno house built in 2015 can have drifted insulation, rodent tunnels, or blocked baffles within a few years. Age is not a proxy for condition.
- Waiting until you feel a draft or see a bill spike to inspect. By the time your comfort or your PG&E bill tells you something is wrong, you’ve been paying the cost of the problem for months or years. October inspection is prevention, not diagnosis after the fact.
- Walking on the insulation or the drywall between joists. Stepping through a ceiling is the most expensive insulation mistake you can make in a single afternoon. Move only on joists, and if you’re at all unsure of the framing layout, call a professional.
- Ignoring rodent tunnels because the rodents are gone. Removing the animals is step one. Evaluating and repairing the insulation damage is step two. A rodent-free attic with tunneled insulation is still a compromised attic.
- Topping up over moldy or water-damaged insulation. Adding new material over existing contamination doesn’t fix anything. The contaminated area needs to be removed first, or you’re just burying a problem that will continue to grow underneath.
- Skipping air sealing before adding insulation. More insulation is a bandage if air is still moving through recessed lights, the hatch, and wall top plates. The best Fresno attics are air-sealed first and insulated second. Sealing after insulating means pulling material back and re-doing the job.
When to Call a Professional
Some attic insulation issues are genuinely DIY-addressable: documenting, photographing, measuring depth, checking the hatch weatherstripping. Others are not. If you’re weighing whether to tackle it yourself, read DIY vs Professional Insulation: The Fresno Homeowner’s Decision Guide. If you find mold or water stains on the roof deck, you need someone who can trace the moisture source, not just replace the stained material. If the insulation is matted, tunneled, or contaminated, the fix often involves removal and reinstallation, which requires commercial vacuum equipment, respirators, and proper disposal. If you’re unsure about walking in your attic, or the framing isn’t clear enough to navigate safely, that’s a job for someone who does it every day. Woolsey Insulation Fresno offers free estimates throughout Fresno, including neighborhoods like Woodward Park, Fig Garden, and Sunnyside. Call (559) 785-2658 and we’ll walk you through what we need from you.
Frequently Asked Questions
Once a year, and the ideal time is late October. That timing catches the full accumulated effect of summer heat stress on your insulation, gets you ahead of winter rodent activity, and lets you identify problems before heating season masks them. A thorough inspection of a typical Fresno attic takes 45 minutes to an hour, and the only tools you need are a flashlight, a ruler, and a camera or phone.
Most attic insulation work in Fresno runs between $1,500 and $4,500 depending on attic size, current material condition, and what needs to happen. A top-up of blown-in over a 1,200-square-foot attic might run $900 to $1,800, while a full removal, air sealing, and reinstallation in that same attic can run $2,500 to $4,500. These are honest ranges, not quotes. Call (559) 785-2658 and we’ll give you a written price before any work starts, based on your specific attic, your photos, and your measurements.
It’s usually cheaper to repair or top up than to replace, but the answer depends entirely on the condition of the existing material. If the insulation is dry, uncontaminated, and simply settled or drifted in places, a top-up is the lower-cost solution. If it’s matted, moldy, or heavily tunneled by rodents, replacement is the economically honest choice, because adding new material over compromised fiber just creates a situation you’ll pay to address twice. Call (559) 785-2658 for an exact quote. Estimates are free.
You can and should inspect the basics yourself. With a flashlight, a ruler, and a camera, a Fresno homeowner can assess depth, check the eaves and hatch zones, spot obvious rodent tunnels and water stains, and document everything for a professional quote. The things you cannot safely or effectively DIY are removal of contaminated material, tracing and fixing persistent moisture sources, and any air-sealing work that requires reaching into the eaves or working around recessed lights. Use your inspection to gather information; use a professional to act on it.
The current code target for attics in Fresno’s Climate Zone 3 is R-38. In practical terms, that means 10 to 14 inches of blown-in fiberglass or about 8 to 10 inches of blown-in cellulose, depending on the product’s density. Older Fresno homes often have R-19 or R-30 from the original build, and every inch below target is lost performance in both summer and winter.
Photograph the attic from the hatch, take close-ups of the eaves, center field, and hatch perimeter, include a ruler pushed down to the drywall in at least three locations, capture any damage you see, and note your total attic square footage. Send that to Woolsey Insulation Fresno and we can provide a written price based on your documentation. If we need to see something more closely, we’ll tell you exactly what to photograph. Call (559) 785-2658 to start.
The Bottom Line
Fresno attic insulation doesn’t fail in a day. It fails in a slow drift: blown-in settling away from the eaves, rodent tunnels compressing channels through the material, moisture staining the roof deck, and the R-value eroding under a hundred forty-degree summers. The good news is that none of this is invisible if you look at the right places at the right time. Inspect the eaves, the center field, and the hatch perimeter. Do it in October. Measure your depth with a ruler, photograph what you find, and don’t hesitate to call for a professional opinion when something looks wrong. Your attic is the cheapest square footage in your house to fix and the most expensive square footage to ignore. For more guides & resources on keeping your home efficient, visit our blog.
Written by Glenn Hartley, Owner at Woolsey Insulation Fresno, serving Fresno since 2002.